Elevate Your Shed Game: Unveiling the Magic of Concrete Foundations

Preparing the Ground
Before your shed becomes the envy of your neighbors, you gotta handle the dirt. Yep, setting up a sturdy base is where it all starts. Think of it like making a trusty lasagna—get the layers wrong, and you're asking for trouble. Your shed deserves a solid start, so let's get to it.
Leveling the Ground
Straighten up the ground game, folks. That patch of dirt needs to be as level as your grandma's holiday table. Here's how:
-
Clearing the Crap: Kick out rocks, twigs, and anything else that’s cluttering up your serene slice of land.
-
Yes, We Need Boundaries: Use stakes and string to map out where your shed will proudly stand. It's like drawing a chalk line for a dance-off: keep it tidy!
-
Dig Baby, Dig: Get that soil out to the depth the shed gods demand. Builders' codes and your drainage needs are the boss here.
-
Stomp the Yard: Compact the soil like you’re packing a good picnic basket, leaving no soft spots.
-
Gravel's Grand Entrance: Throw in a gravel layer to play bouncer—keeping water away and holding up that foundation like a champ.
Excavating for the Foundation
So, you've smoothed the earth. Now it's time to delve into the great abyss. Okay, maybe that's a tad dramatic. But still, this is where the magic happens.
-
Pick the Perfect Spot: Your shed needs to feel at home! Look for a place it's easy to access and the ground's cozy.
-
Square's Where It's At: Use stakes to mark corners like a pro. Ensure these corners are square enough to make a geometry teacher proud.
-
Shovel Some Serious Dirt: Dig out your spot—just deep enough to fit your plans and keep it all above board with mother nature.
4.Got Perimeter?: Some foundations scream for a border like that fancy garden fence your aunt loves. Consider it if it makes sense.
- Gravel: The Sequel: After excavating, lay down gravel for drainage. It’s the unsung hero of shed success.
For foolproof results, grab some 2x4s and a trusty level. Check for bumps needing a trim and valleys asking for a fill (Site Prep). Put simply: having your shed relaxing straight on the ground is an open invitation to moisture and more problems than a daytime soap (Site Prep).
Lock in these steps, and you'll create the kind of base that makes your shed look like it emerged from a home and garden fairy tale. A good foundation isn't just advisable; it's the very soul of your structure's future resilience.
Building a Strong Foundation
Building a sturdy shed starts from the ground up. The secret's in the base – a solid, well-prepped foundation sets the stage for long-lasting stability. We're talking gravel, sand, a bit of leveling love, and you've got yourself a foundation that's ready to hold its own.
Adding Gravel Layer
First off, you gotta get the ground nice and flat. That means digging out the dirt to just the right depth – usually about 6 inches works for a concrete slab base, or so says HK Contractors. With the soil outta the way, in goes a 4-inch thick layer of gravel. This gravel not only packs down the ground but also lets water drain away, giving the whole foundation a solid backbone.
Installing Sand Layer
Next up, it's sand time. A cozy 2-inch layer on top of that gravel is the way to go, again according to the pros at HK Contractors. This sand acts like a cushion, smoothing things out and getting the base ready for the concrete pour. Think of it as laying the welcome mat for your concrete slab.
Checking for Level
Keeping the foundation level is like giving the shed a strong spine – it keeps everything balanced and sturdy. The folks over at Site Prep suggest using a piece of 2x4 lumber and a level to make sure everything’s even. Span the lumber across your foundation, check with the level, and make adjustments as needed. If it’s high, shave it down; if it’s low, fill it in, ensuring a nice, flat expanse.
Layer that gravel and sand right, keep things level, and your shed's foundation will be ready for years of service. Doing this prep work not only locks down the structure but helps sidestep problems like sinking or water damage. For more on these kinds of shed projects, swing by our article on shed base ideas.
Concrete Shed Foundations
Building a strong and stable base for your shed? Concrete's your best friend. Let's break down two biggies you need to know: how thick that slab should be and what it's gonna cost you.
Thickness Recommendations
Getting the right thickness for your concrete slab is like putting the right shoes on your feet. Most sheds do just fine with a 4-inch thick slab—strong and sturdy enough for most regular-sized shacks (Homestead Supplier). But, if you’re planning to pile in equipment or heavy items, consider beefing that slab up to 6 inches. Keep in mind what you wanna put in there; too thin and you might regret it when those walls start cracking.
Grabbing the right thickness ensures your shed won’t just be a temporary stay—it’s about putting down roots that'll hold up over the years, plain and simple.
Cost Considerations
Worried about what this might do to your piggy bank? A 4-inch thick slab runs roughly $90 to $120 per square meter. If you're going for the big league with a 6-inch slab, expect to toss in a bit more (Homestead Supplier).
Concrete's a favorite among homeowners because it’s tough as nails. And sometimes, the local folks who give building permissions pretty much insist on something solid like concrete for anything portable or meant to last. Different mixes cater to different needs, kinda like picking between sneakers and steel-toed boots:
- C20 mix: Great for light loads, like a cozy backyard shed.
- C25 or ST2 mix: Flexible for commercial stuff, but also right at home in your yard, perfect for footings and foundations.
So, think of concrete not just as grey, dull stuff. It's the tough and reliable option that’ll keep your outdoor structure going strong, through the long haul, without a hitch. Figure out what your shed needs, go with the right concrete, and you'll have a base that’s as solid as a rock for years to come.
Factors Affecting Foundation
Building a solid base for your humble shed isn't just about mixing concrete and hoping for the best. There's a bunch of key stuff that can mess with how sturdy and long-lasting your little garden fortress turns out to be. Two big hitters are what kind of dirt you’ve got and how wild the weather gets in your neck of the woods.
Soil Type Influence
The kind of soil you’re dealing with can seriously affect how beefy your shed’s foundation needs to be. Not all dirt is created equal. Some, like compact clay or solid bedrock, can hold more weight and keep your shed standing tall on a thinner slab of concrete. But if you’ve got loose, sandy stuff, or it feels like your backyard might just be a sandbox, then you’ll need a thicker slab to keep things from shifting around like a wobbly table.
It’s like the difference between walking on solid ground versus loose sand; one’s way easier on your knees, right? If you're thinking maybe a concrete slab isn't your thing, there’s always the rock-solid charm of a gravel shed foundation.
Climate Impact on Thickness
Now, let’s chat about weather. If you live where the seasons can’t quite make up their mind, especially somewhere with frosty winters and their sneaky freeze-thaw dance, you'll need to beef up that concrete layer. In the battle of concrete versus Mother Nature, extra thickness and some trusty reinforcement rods keep cracks away and the structure safe from frost-heaved soil throwing a tantrum.
Think of it like wearing a thicker coat because winter's feeling extra moody. Adjusting your foundation this way ensures your shed laughs in the face of tough weather. For more bright ideas on bases and weather-proofing, check out our nifty piece about shed base ideas.
When you get to grips with how different soils and climates play their part, you’re setting the stage for a shed that’ll stick around for years. It’s all about making choices that fit your specific plot of land, ensuring your shed's standing firm, no matter what the skies or the ground throw its way.
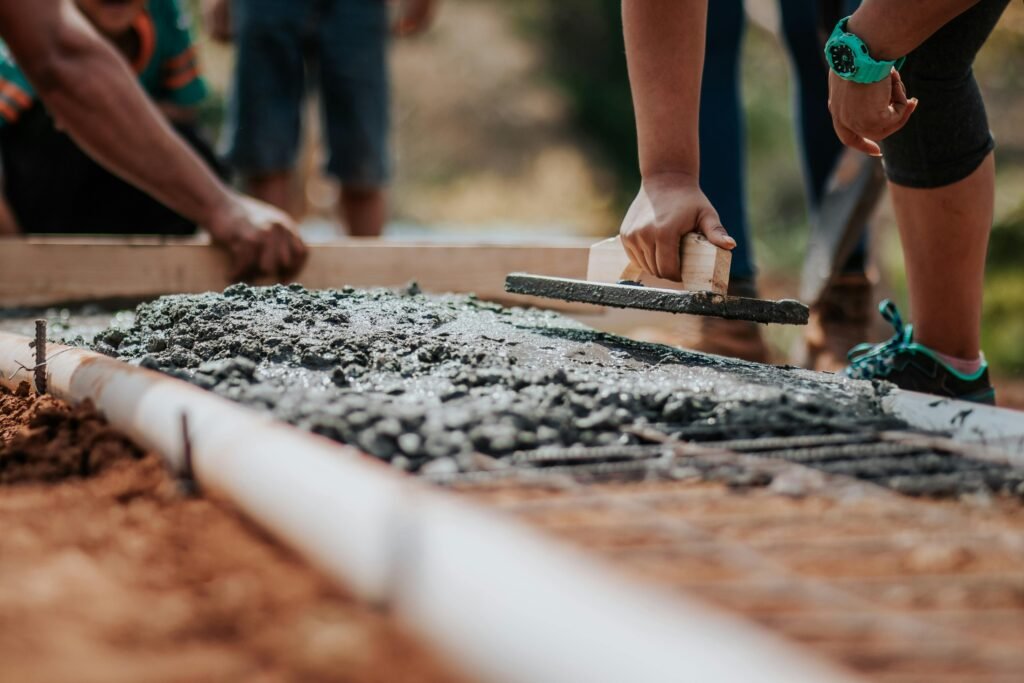
Curing Concrete Slabs
Properly curing concrete slabs is a big deal when it comes to building a solid base for your shed. This step is what makes sure the concrete gets all strong and tough over time. We’re gonna walk you through what curing's all about, and how to speed things up if you’re impatient.
Curing Process Overview
For those backyard projects like sidewalks, concrete might be ready to go in just a day or two. But when you’re dealing with bigger stuff, like the slabs under your shed, well, you’re in it for the long haul. Those bad boys can take up to two months to really be ready for action. Start putting up walls about a week after pouring, once it's roughly 75% ready (Psst, Perma Pier’s got your back).
What speeds this up or drags it out? We’re talking slab size, how much water you mixed in, what the weather's doing, the kind of mix you used, and whether you slapped on some sealer or compounds (Shoutout to Perma Pier again). Do it right, and your concrete will stand tall, resisting those pesky cracks and dings over time.
Accelerating the Curing Process
So you're in a hurry? Well, there's a few tricks to make concrete dry its soggy self faster. Curing compounds are your buddy—they keep the water from running off, locking in that precious moisture. But remember: only use these on flat stuff, not the sides—unless you dig the stained look (Perma Pier strikes again!).
Want another hack? Get the environment to play nice. Warmer temps and more humidity speed things along. Give your slab a little love by covering it with a damp burlap or giving it a gentle mist with water during its first week. These tricks fire up the magic inside the concrete, making it tougher faster (Guess who? Yep, Perma Pier).
Recognize how curing isn’t just paperwork. It’s what keeps your concrete slab in top-notch condition. Whether you're sprinkling compounds or controlling the weather, put curing at the top of your to-do list and enjoy a shed foundation built to last.
Alternatives to Concrete
When thinking about what to put under a shed instead of your usual concrete slabs, folks might lean toward some less traditional options. Gravel bases and a cool thing called soil cement are making waves as alternative choices that bring their own perks (and a couple of quirks) to the table.
Gravel Bases
Setting up a gravel base for your shed can be a real game-changer, especially if you’re looking for something a bit easier on the wallet and more in tune with nature. One of the big wins with gravel is its killer drainage — water just zips right out, which means you don’t have to worry so much about things like rot setting in or mold creeping up.
Still, before you fill your boots and grab the shovel, keep in mind that gravel ain’t perfect. Gravel-filled grids — those handy little surfaces — might let moisture sneak in more easily. Plus, it’s a free-for-all for bugs to throw a party under your shed, and if you’ve got loose gravel, things could get wobbly over time. Oh, and don’t forget about the dust. No one asked for extra chores.
But if you’re all about that rugged vibe and are cool with a bit of compromise, a gravel base could suit you just fine. Think about what your shed’s really gonna need, then decide if gravel’s got what it takes. Want to dive deeper into shed foundation ideas? Check out our chat on shed base ideas.
Soil Cement as an Alternative
Let’s talk soil cement — a nifty eco-friendly choice that won’t empty out your piggy bank. Here’s the deal: mix a smidge of portland cement (like 5-10%) with dirt and give it a good compacting, and you’ve got yourself a nice, sturdy base that won’t quit.
The big plus here is it’s not just friendly to your budget, it's also kind to Mother Nature. You’re using what’s right there under your nose in the ground and just a tickle of cement to meet your shed's needs without going full concrete jungle mode.
But hold up — before you grab your resources and start mixing, it’s wise to get a good read on your soil. Talk to some savvy folks in the know to make sure your homemade soil cement stands strong and steady. Getting familiar with the quirks of soil cement means you’ll be making a savvy pick for your shed base. Want to deep-dive into the nitty-gritty of getting your shed base just right? Head on over to our guide on how to build a shed foundation.
- Crafting Affordable Dream Sheds: Cost-Effective Solutions for You
- Affordable Outdoor Storage: Budget-Friendly Shed Alternatives
- Dont Break the Bank: Top Picks for Cheap Shed Options
- Crafting Cost-Effective Solutions: Affordable Shed Construction Explained
- Empowering Your Space: Tips for Managing Shed Construction Budget
- Unveiling Shed Building Cost Estimator: Your Budgets Best Friend
- Revamp Your Shed: Creative Shed Base Ideas for Your Outdoor Oasis
- Elevate Your Shed Game: Unveiling the Magic of Concrete Foundations
- Budget-Friendly Solutions: Exploring Prefab Shed Prices
- Step-by-Step Gravel Shed Foundation Building Made Easy

Leave a Reply
You must be logged in to post a comment.