How to Weatherproof Your Shed: Essential Tips for Protecting Your Outdoor Storage
Introduction
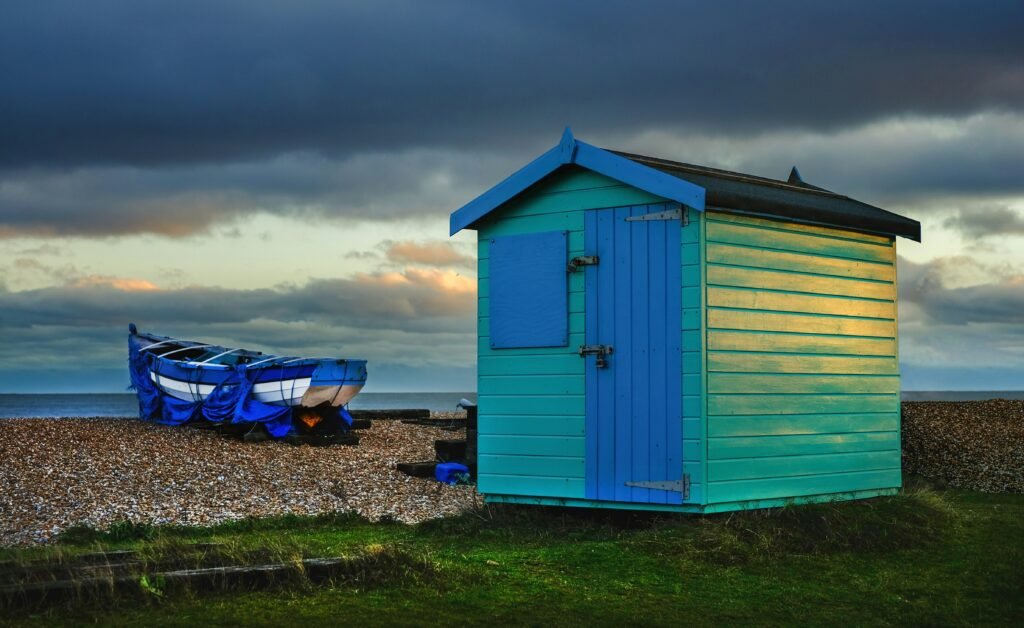
Weather can take a toll on outdoor structures like sheds, leading to damage and deterioration over time. Weatherproofing is essential to ensure its longevity and functionality, whether you use your shed for storage, as a workshop, or for other purposes. In this guide, we'll explore practical strategies and techniques to effectively weatherproof your shed, keeping it safe and secure against the elements.
Step-by-Step Guide: How to Weatherproof Your Shed
Step 1: Assess Your Shed's Vulnerabilities
Before diving into weatherproofing methods, assessing your shed's vulnerabilities is crucial. Examine the current condition of your shed and identify areas prone to weather damage. Common vulnerable areas include doors, windows, roofing, and the foundation. Commonly vulnerable areas include:
- Doors and Windows: Check for gaps, cracks, or worn weatherstripping.
- Roof: Inspect for missing shingles, damaged flashing, or signs of leakage.
- Walls: Look for cracks, gaps, or areas where water can seep.
- Foundation: Check for cracks or signs of water pooling around the shed's base.
Step 2: Seal and Waterproof
 One of the most fundamental steps in weatherproofing your shed is sealing and waterproofing its surfaces. Apply a premium silicone sealant to address any openings or fissures in the walls, windows, and doors.
Apply a weatherproof coating to the exterior walls and roof to create a protective barrier against moisture infiltration.
- Fill Gaps and Cracks: Apply a premium silicone sealant to fill any openings or fissures in the walls, windows, and doors. Pay special attention to seams and joints.
- Apply Weatherproof Coating: Administer a weather-resistant layer onto the outer walls and roof to establish a shield that guards against moisture penetration. Choose a coating suitable for your shed's material (e.g., wood, metal, plastic).
Step 3: Reinforce Doors and Windows
Doors and windows are often entry points for water and drafts. Strengthen these sections by fitting weather stripping along the borders of doors and windows to establish a secure seal. Consider adding storm shutters or protective coverings to windows to shield them from harsh weather. Here's how to reinforce them:
- Install Weatherstripping: Weatherstripping around the edges of doors and windows creates a tight seal. Ensure that the weatherstripping is in good condition and provides a snug fit.
- Add Protective Coverings: Consider adding storm shutters or protective coverings to windows to shield them from harsh weather conditions. These coverings can help prevent water intrusion and protect glass from damage.
Step 4: Upgrade Roofing Materials
The roof is your shed's first defence against rain, Snow, and UV radiation.
Examine your roof for any indications of damage or deterioration, and contemplate switching to resilient roofing materials like metal or asphalt shingles for enhanced durability. Ensure the roof is installed correctly and free of leaks to prevent water damage to the shed's interior. Upgrade your roofing materials for added durability:
- Inspect Roofing: Scrutinize the roof of your shed to spot any indications of harm or deterioration, like absent shingles or impaired flashing.
- Upgrade to Durable Materials: Consider upgrading to durable roofing materials like metal or asphalt shingles. These materials offer better resistance to weather damage and provide long-term protection for your shed.
Step 5: Improve Drainage and Grading
Adequate drainage helps to avoid water accumulation around the base of your shed. Ensure that the area surrounding your shed is appropriately graded to encourage water runoff away from the structure. Consider installing gutters and downspouts to channel rainwater away from the shed and prevent soil erosion around the foundation. Follow these steps to improve drainage:
- Grade the Area: Ensure that the area surrounding your shed is appropriately graded to encourage water runoff away from the structure. The ground should slope away from the shed to prevent water from pooling around the foundation.
- Install Gutters and Downspouts: Install gutters and downspouts to channel rainwater away from the shed. Ensure the gutters are clear of debris and thoroughly cleaned to avoid blockages and overflowing water.
Step 6: Enhance Ventilation and Air Circulation
 Adequate airflow is essential to avoid moisture accumulation within the shed, which can cause issues like mould, mildew, and decay. Install vents or louvres to promote air circulation and reduce humidity levels. Keep vents clear of debris to ensure optimal airflow year-round. Here's how to enhance ventilation:
- Install Vents or Louvers: To promote air circulation, install vents or louvres in the walls or roof of your shed. Position the vents strategically to ensure optimal airflow throughout the shed.
- Keep Vents Clear: Frequently check and clear vents to eliminate any dirt or blockages hindering air circulation. Clearing vents ensures air can circulate freely, reducing humidity levels inside the shed.
Step 7: Regular Maintenance
To ensure long-lasting weatherproofing, perform regular maintenance on your shed:
- Inspect your shed regularly for wear, damage, or weather-related issues.
- Handle any problems or concerns quickly to avoid exacerbating the situation.
- Reapply Sealant and Coating: Reapply sealant and weatherproof coating to maintain protection against the elements. Follow manufacturer recommendations for product application and reapplication intervals.
Weatherproofing Must Know
Shielding sheds from the elements, such as rain, Snow, wind, and sunlight, involves employing a mix of preventive actions and regular upkeep routines. Here's a comprehensive guide on how to safeguard your shed against these elements:
- Rain Protection:
- Ensure Proper Drainage: Make sure the shed is situated on well-drained ground and that the area around it is graded to slope away from the shed. This prevents water from pooling around the foundation.
- Install Gutters and Downspouts: Install gutters and downspouts to channel rainwater away from the shed, mitigating the potential for water damage to the shed and its contents.
- Apply Waterproof Sealant: Coat the exterior surfaces of the shed with a waterproof sealant to create a protective barrier against rain penetration. Focus on seams, joints, and areas prone to water intrusion.
- Snow Protection:
- Choose Sturdy Roofing Materials: Opt for roofing materials that can withstand heavy Snow, such as metal or asphalt shingles. Ensure the roof is installed correctly and reinforced to support the weight of accumulated Snow.
- Clear Snow Regularly: Remove Snow from the roof and around the shed promptly after snowfall to prevent excess weight buildup and potential structural damage. Use a snow rake or shovel with a long handle to clear Snow safely.
- Insulate and Ventilate: Proper insulation and ventilation help regulate the temperature inside the shed, minimizing the risk of snowmelt and ice formation on the roof. Adequate airflow prevents condensation and reduces the likelihood of ice dams.
- Wind Protection:
- Anchor the Shed: Secure the shed to the ground using anchors or tie-downs to prevent it from being lifted or displaced by strong winds. Anchor points should be installed at multiple locations around the shed for maximum stability.
- Trim Surrounding Trees: Prune back any branches extending over the shed and eliminate any dead or fragile trees nearby to reduce the chance of branches or debris falling during windy weather. This reduces the likelihood of damage to the shed's roof and walls.
- Inspect Regularly: Regularly inspect the shed to check for loose or damaged components, such as roofing materials, siding, and doors. Repair or replace any compromised parts to maintain the shed's structural integrity.
- Sunlight Protection:
- Apply UV-Resistant Coating: Protect the shed's exterior surfaces from sun damage by applying a UV-resistant coating or paint. This helps prevent fading, warping, and deterioration caused by prolonged exposure to sunlight.
- Provide Shade: Position the shed in a shaded area or install a canopy or awning to shield it from direct sunlight. Shade structures reduce heat buildup inside the shed and extend the lifespan of materials such as wood and plastic.
- Use Reflective Materials: Choose roofing materials and exterior finishes with reflective properties to deflect sunlight and reduce heat absorption. Light-coloured paints and metal roofs minimize heat transfer to the shed's interior.
By implementing these measures, you can effectively protect your shed from the damaging effects of rain, Snow, wind, and sunlight, ensuring its longevity and functionality for years to come. Regular maintenance and proactive upkeep are essential for maintaining the shed's resilience against changing weather conditions.
Tips and Techniques in Weatherproofing
Here are some tips and techniques on how to weatherproof your shed effectively:
- Seal and Caulk Gaps:
- Inspect the shed for gaps, cracks, or openings where water can penetrate.
- Use a high-quality silicone caulk to seal gaps around windows, doors, vents, and seams in the walls and roof.
- Waterproof Exterior Surfaces:
- Apply a waterproof sealant or paint for outdoor use to the exterior walls, roof, and trim.
- Ensure the sealant is applied evenly and covers all exposed surfaces to create a protective barrier against moisture.
- Upgrade Door and Window Seals:
- Fit weather stripping around the openings of doors and windows to form a secure seal, effectively stopping water from seeping in.
- Consider adding drip caps above doors and windows to redirect rainwater away from the openings.
- Protective Coatings:
- To safeguard wooden surfaces from moisture, UV rays, and rot, it's advisable to apply a weather-resistant coating or stain. This protective layer shields the wood and prolongs its durability when exposed to outdoor elements.
- For optimal protection, choose a product formulated for the specific material of your shed (e.g., wood, metal, plastic).
- Ensure Proper Ventilation:
- Install vents or louvres in the walls or roof of the shed to promote airflow and reduce humidity.
- Keep vents clear of debris to prevent blockages that could impede airflow and lead to moisture buildup.
- Elevate the Shed:
- Elevate the shed on a foundation or platform to prevent water from pooling around the base.
- Ensure the shed is level and properly supported to prevent structural issues.
- Install Gutters and Downspouts:
- Add gutters and downspouts to the shed to channel rainwater away from the structure.
- Position downspouts to direct water at least a few feet from the shed's foundation to prevent water damage.
- Inspect and Maintain Regularly:
- Regularly inspect the shed for wear, damage, or weather-related issues.
- Address any issues promptly, such as repairing damaged roofing materials or replacing worn weather stripping.
- Consider Protective Covers:
- Invest in protective covers or tarps to shield the shed from extreme weather conditions, such as heavy rain or snowstorms.
- Secure the covers tightly to prevent wind damage and ensure maximum protection.
- Use Durable Materials:
- Choose durable materials for construction and repairs to ensure the shed's longevity.
- Opt for rust-resistant hardware, treated lumber, and UV-resistant plastics for components exposed to the elements.
By applying these suggestions and methods, you can adequately shield your shed from the detrimental impacts of rain, Snow, wind, and sunlight. Regular maintenance and proactive measures are vital to maintaining the shed's integrity and prolonging its lifespan.
DIY Vs. Professional
Weatherproofing a shed can be done by either the shed owner or a hired professional, depending on the individual's preferences, expertise, and resources. Here's a breakdown of both options:
- DIY Weatherproofing by the Shed Owner:
- Shed owners comfortable with basic construction and maintenance tasks may weatherproof their shed.
- DIY weatherproofing saves owners money on labour costs and gives them greater control over the process.
- Owners can tailor the weatherproofing techniques to suit their shed's specific needs and preferences.
- However, DIY weatherproofing requires time, effort, and access to the necessary tools and materials. It also risks errors or incomplete weatherproofing if not done correctly.
- Professional Weatherproofing Services:
- Shed owners needing more skills, time, or inclination to weatherproof their shed may hire a professional contractor or handyperson.
- Professional weatherproofing services offer expertise, efficiency, and convenience, as experienced professionals can complete the job quickly and effectively.
- Contractors may also have access to specialized equipment and materials not readily available to homeowners.
- However, hiring professionals typically entails additional labour and materials costs, which should be factored into the budget for weatherproofing projects.
- Researching and hiring reputable contractors with relevant experience in weatherproofing sheds is essential to ensure quality artistry and satisfactory results.
Ultimately, deciding who should weatherproof the shed depends on factors such as personal skills and preferences, budget considerations, and the complexity of the weatherproofing project. Whether DIY or professional, the goal is to protect the shed from the elements and ensure its durability and longevity.
FAQS
Here are some frequently asked questions (FAQs) about weatherproofing sheds, along with their answers:
- Why is weatherproofing important for sheds? Weatherproofing is crucial for sheds because it helps protect them from damage caused by rain, Snow, wind, and sunlight. Without proper weatherproofing, sheds are susceptible to leaks, rot, mould, and structural deterioration, which can shorten their lifespan and compromise functionality.
- How often should I weatherproof my shed? The frequency of weatherproofing depends on various factors, such as the shed's material, location, and exposure to harsh weather conditions. As a general rule, it's recommended to inspect and maintain your shed at least once a year. You might find it necessary to apply weatherproofing more often if you observe any indications of deterioration or harm.
- Can I use the same weatherproofing techniques for different types of sheds? While many weatherproofing methods are applicable across different shed types, it's essential to consider each shed's specific characteristics and materials. For example, wooden sheds may require treatments other than those of metal or plastic sheds. Tailor your weatherproofing approach to suit the unique needs of your shed.
- How can I tell if my shed needs weatherproofing? Signs that your shed may need weatherproofing include water stains, mould or mildew growth, rotting wood, peeling paint, and drafts. Conduct regular inspections of your shed, especially after periods of heavy rain or Snow, to identify any vulnerabilities that must be addressed.
- What are some cost-effective weatherproofing solutions for sheds? Cost-effective weatherproofing solutions for sheds include sealing gaps with silicone caulk, applying waterproof sealant or paint, installing weatherstripping around doors and windows, and ensuring proper ventilation. These measures can help prevent water intrusion and protect your shed without breaking the bank.
- Can I hire a professional to weatherproof my shed? Hiring an experienced contractor or handyperson to weatherproof your shed can be a convenient option, especially if you're uncomfortable tackling the project yourself. It's crucial to investigate and thoroughly locate reliable contractors within your vicinity. Reach out to them and request quotes for the work you need to be done. This guarantees that you obtain excellent service at a just and competitive cost.
- Are there any eco-friendly weatherproofing options available? Eco-friendly weatherproofing options, such as water-based sealants and low-VOC (volatile organic compound) paints, are available. Additionally, using reclaimed or sustainably sourced materials for shed construction can minimize environmental impact while providing effective weatherproofing.
- How can I prevent condensation inside my shed? To avoid condensation inside your shed, ensure proper ventilation by installing vents or louvres and keeping them clear of obstructions. Additionally, consider insulating the shed to regulate temperature and reduce moisture buildup. Regularly remove excess moisture with a dehumidifier or moisture-absorbing materials.
- Can I DIY weatherproofing for my shed, or do I need professional help? Many shed weatherproofing tasks can be done as DIY projects, especially if you have basic handyperson skills and the necessary tools. However, specific functions like roof repairs or electrical work may require professional assistance. Assess your abilities and the project scope before deciding whether to DIY or hire a professional.
- How long does weatherproofing treatment typically last? Several variables, such as the calibre of the materials used, the state of the weather, and the amount of maintenance done, can affect how effective a weatherproofing treatment is. In general, most weatherproofing treatments last several years before needing to be reapplied. However, monitoring your shed regularly and reapply weatherproofing as necessary to maintain protection is essential.
DIY Cost Vs. Professional Cost
Below is a table outlining the potential costs of weatherproofing a shed, including DIY and professional options. Please be aware that the final expenses may differ based on the shed's dimensions, the specific materials chosen, and the prevailing labour rates in your local area.
These figures are provided as estimates for reference:
| Weatherproofing Task | DIY Cost | Professional Cost |
| Sealant and Caulk | $20 - $50 | $100 - $300 |
| Waterproofing Coating/Paint | $50 - $100 | $200 - $500 |
| Weatherstripping | $10 - $30 | $50 - $150 |
| Protective Coatings/Stains | $50 - $100 | $200 - $500 |
| Ventilation Installation | $20 - $50 | $100 - $300 |
| Gutters and Downspouts | $100 - $200 | $300 - $800 |
| Roof Repair/Replacement | $200 - $500 | $500 - $1500 |
| Foundation/Grading Work | $100 - $300 | $500 - $1000 |
| Insulation | $50 - $100 | $200 - $500 |
| Professional Labor (if applicable) | N/A | $500 - $2000 |
Please remember that these cost estimates are for materials only in the DIY column and include materials and labour in the Professional Cost column. Prices can vary significantly based on shed size, local labour rates, and the extent of weatherproofing required.
Getting price estimates from contractors or suppliers is crucial to accurately determining the costs associated with your particular project.
Additional Resources
Here are some additional resources that shed owners can consult for further information and guidance on weatherproofing their sheds:
- DIY Websites and Guides:
- Websites like DIY Network (diynetwork.com) and This Old House (thisoldhouse.com) offer comprehensive guides, tutorials, and videos on various home improvement projects, including shed weatherproofing.
- Online forums and community platforms such as Reddit's r/DIY and GardenWeb's GardenWeb Forums provide opportunities for shed owners to seek advice, share experiences, and ask questions about weatherproofing projects.
- Home Improvement Books:
- Books like "The Complete Do-it-Yourself Manual" by Editors of Family Handyman and "Black & Decker The Complete Guide to Sheds" by Editors of Cool Springs Press provide detailed instructions and tips on shed construction, maintenance, and weatherproofing.
- Check your local library or bookstore for a wide selection of home improvement books covering shed-related topics.
- Manufacturer Websites and Product Guides:
- Many manufacturers of weatherproofing products, such as sealants, coatings, and weather stripping, offer comprehensive guides, FAQs, and instructional videos on their websites.
- Explore websites of reputable manufacturers like Rust-Oleum, DAP, and 3M for product recommendations, application instructions, and troubleshooting tips.
- Professional Associations and Organizations:
- Organizations like the National Association of Home Builders and the National Association of the Remodeling Industry offer helpful information, supplies, and instructional tools for building and maintaining sheds. They also offer advice on effective weatherproofing methods.
- Contact local chapters or affiliates of these associations for workshops, seminars, and networking opportunities related to home improvement projects.
- Online Video Platforms:
- Video-sharing platforms like YouTube and Vimeo host many instructional videos and tutorials on shed weatherproofing techniques.
- Search for channels and creators specializing in home improvement, construction, and DIY projects, such as This Old House, Home Repair Tutor, and HouseImprovements.
- Government and Extension Services:
- Government agencies and extension services, such as the U.S. Department of Agriculture (USDA) and Cooperative Extension System, often publish informative guides and fact sheets on home maintenance and improvement topics.
- Explore their websites or visit local extension offices for resources on weatherproofing sheds and other outdoor structures.
By leveraging these additional resources, shed owners can access a wealth of information, tips, and expert advice to help them effectively weatherproof and protect their sheds from the elements.
Key Takeaways
Here are the key takeaways from the provided information on weatherproofing sheds:
- Importance of Weatherproofing: Weatherproofing is essential for protecting sheds from damage caused by rain, Snow, wind, and sunlight. Proper weatherproofing helps extend the lifespan of sheds and ensures their structural integrity over time.
- DIY vs. Professional Options: Shed owners can weatherproof their sheds themselves (DIY) or hire a professional contractor. DIY projects can be cost-effective but require time, effort, and expertise, while professional services offer convenience and expertise but come with additional costs.
- Weatherproofing Tasks: Common weatherproofing tasks include sealing gaps and cracks, applying waterproof coatings, installing weatherstripping, reinforcing doors and windows, improving ventilation, and addressing drainage issues.
- Materials and Costs: Weatherproofing materials vary in cost and include sealants, coatings, weatherstripping, roofing materials, and insulation. DIY costs typically range from tens to hundreds of dollars, while professional expenses can range from hundreds to thousands, depending on the project's scope.
- Regular Maintenance: Regular examinations and upkeep play a vital role in maintaining the efficacy of weatherproofing techniques. Shed owners should monitor for signs of wear, damage, or weather-related issues and address them promptly to prevent further damage.
- Research and Planning: Before embarking on a weatherproofing project, shed owners should research weatherproofing techniques, gather necessary materials, and develop a plan tailored to their shed's specific needs and conditions.
- Environmental Considerations: Use eco-friendly weatherproofing options, such as low-VOC sealants and reclaimed materials, to minimize environmental impact and promote sustainability.
- Seeking Additional Resources: Shed owners can access additional resources, including DIY websites, home improvement books, professional associations, online videos, and government services, for further information and guidance on weatherproofing sheds.
By following these key takeaways and implementing effective weatherproofing strategies, shed owners can protect their sheds from the elements and ensure their long-term durability and functionality.
Conclusion
Weatherproofing your shed is a proactive measure that can save you time, money, and headaches in the long run. By adhering to these crucial tips and methods, you can safeguard your shed from the detrimental impacts of weather and extend its longevity. Consistently examine and upkeep your shed to guarantee ongoing defense against outdoor elements.
- Shed Maintenance & Care: Keep Your Shed in Top Shape
- Shed Foundations Explained: 7 Options & How to Choose
- How to Build a Shed: Step-by-Step Foundation to Roof
- The Complete Guide to Buying a Shed: Comparison & Tips
- Crafting Affordable Dream Sheds: Cost-Effective Solutions for You
- Affordable Outdoor Storage: Budget-Friendly Shed Alternatives
- Cheap Shed Options: 9 Affordable Picks Under $500 (2026)
- Crafting Cost-Effective Solutions: Affordable Shed Construction Explained
- Empowering Your Space: Tips for Managing Shed Construction Budget
- Unveiling Shed Building Cost Estimator: Your Budgets Best Friend

Leave a Reply
You must be logged in to post a comment.