Maximizing Comfort: A Guide to Insulating Your Shed for Year-Round Use
Introduction
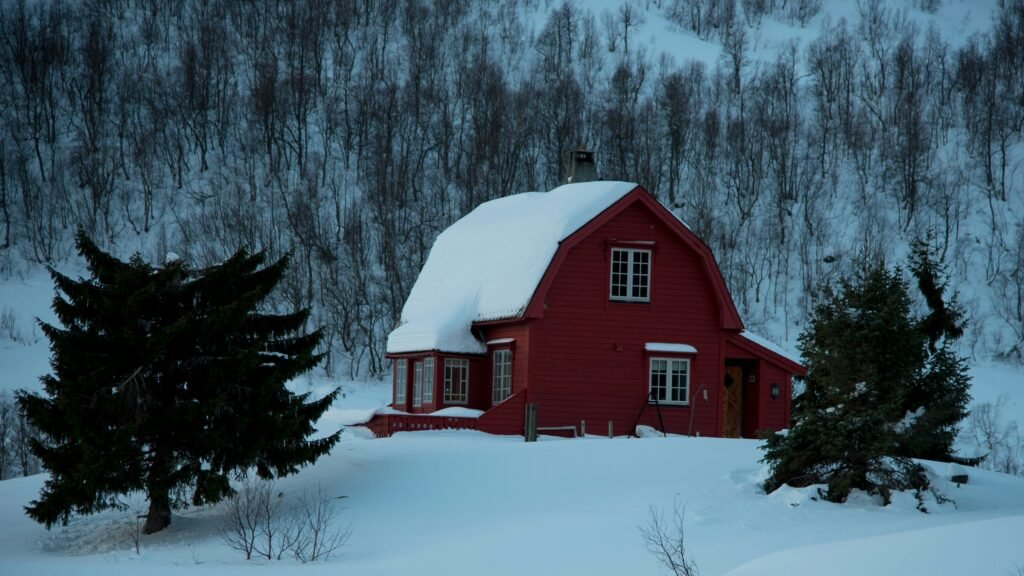
Converting your shed into a flexible and cozy area that you can use all year round is entirely feasible with the appropriate insulation methods. Whether you use your shed as a workshop, home office, or storage area, insulating it effectively can significantly affect its usability and energy efficiency. In this comprehensive guide, we'll explore everything you need to know about insulating your shed for year-round use, from understanding the importance of insulation to practical tips for installation and maintenance.
Quick Tips for Shed Insulation
Before we delve into the details, here are some quick tips to keep in mind when insulating your shed:
- Assess Your Needs: Consider your shed's size, location, and intended use to determine the most suitable insulation materials and techniques.
- Focus on Sealing: Properly seal gaps, cracks, or openings in the shed to prevent air leakage and maximize insulation effectiveness.
- Choose the Right Materials: Choose insulation materials that have the right R-value for your climate and fit your budget, making sure they work well with the type of construction used for your shed.
- Ensure Adequate Ventilation: It's essential to strike a balance between insulation and adequate ventilation to prevent the accumulation of moisture and ensure good air quality within the shed.
- Consider Long-Term Maintenance: Plan regular maintenance to keep your shed insulation in optimal condition and prolong its lifespan.
Let's dive into insulating your shed for year-round comfort and functionality.
Understanding Shed Insulation
Before you start insulating your shed, it's essential to understand the basics of shed insulation and the factors that influence its effectiveness.
Definition and Purpose
Shed insulation involves adding a barrier between the shed's interior and exterior walls, ceiling, and Floor to regulate temperature and moisture levels. Insulation serves the primary goal of enhancing comfort and energy efficiency within the shed, enabling its usability throughout the year.
Factors to Consider Before Insulating
 Several factors should be taken into account before choosing insulation materials and techniques for your shed:
- Climate: Consider the environment of your location, including temperature fluctuations, humidity levels, and prevalent weather conditions.
- Shed Material: The construction materials of your shed, such as wood, metal, or plastic, will influence the choice of insulation materials and installation methods.
- Intended Use: Determine how you plan to use the shed and the level of insulation required to meet your needs, whether for storage, work, or leisure activities.
Common Insulation Materials and Their Pros and Cons
There are various insulation materials available in the market, each with its own set of advantages and disadvantages:
| Insulation Material | Pros | Cons |
| Fiberglass | - Affordable | - Can irritate skin and lungs |
| - Easy to install | - Prone to moisture absorption | |
| Foam Board | - High R-value | - More expensive than fiberglass |
| - Resistant to moisture and insects | - Not suitable for all shed types | |
| Spray Foam | - Excellent air-sealing properties | - Requires professional installation |
| - Provides superior insulation | - Expensive | |
| Reflective Foil Insulation | - Reflects heat away from the shed | - Less effective in cold climates |
| - Lightweight and easy to install | - Requires proper installation | |
| Natural Materials | - Environmentally friendly options | - Variable R-value |
| (e.g., Wool, Cotton) | - Renewable and biodegradable | - Prone to pests and mold growth |
Steps to Insulate Your Shed
 Now that you have a better understanding of shed insulation and the available materials, let's walk through the steps to insulate your shed effectively:
Preparing the Shed
Before you begin insulating, take the time to prepare the shed by following these steps:
- Cleaning and Clearing the Space: Remove any clutter or debris from the shed to create a clean and accessible workspace.
- Sealing Cracks and Gaps: Examine the shed thoroughly to identify any openings or fissures in the walls, ceiling, and Floor. Apply caulk or weatherstripping to seal these gaps effectively.
- Assessing Ventilation Needs: Determine your shed's ventilation requirements to prevent moisture buildup and ensure adequate airflow.
Choosing the Right Insulation Material
Selecting the appropriate insulation material is crucial for achieving optimal results:
- Considering R-Value and Thickness: Choose insulation materials with the proper R-value and thickness to provide adequate thermal resistance for your climate.
- Compatibility with Shed Construction: Ensure that your insulation material is compatible with your shed's construction materials and design.
- Cost-Effectiveness: Balance the cost of insulation materials with their performance and longevity to find the most cost-effective solution.
Installation Process
Once you've chosen the insulation material, it's time to proceed with the installation:
- Installing Insulation in Walls: Cut the insulation material to fit the dimensions of the shed walls and secure them in place using adhesive or staples.
- Insulating the Ceiling: Install insulation batts or panels in the ceiling, ensuring complete coverage and sealing gaps or joints.
- Insulating the Floor (if applicable): If your shed has an elevated floor from the ground, you can insulate it using suitable materials like foam board or fiberglass batts.
- Sealing Joints and Edges: Seal all joints, edges, and seams of the insulation material to prevent air leakage and maximize insulation effectiveness.
Ensuring Proper Ventilation
Adequate airflow is crucial for preserving air purity and averting problems caused by excess moisture:
- Importance of Air Circulation: Ensure sufficient airflow inside the shed to prevent stagnant air and moisture buildup.
- Installing Vents or Fans: Install passive or active ventilation systems, such as vents, fans, or louvers, to promote air exchange and regulate temperature.
- Preventing Moisture Buildup: Use moisture barriers and dehumidifiers to prevent condensation and moisture accumulation inside the shed.
Additional Tips for Year-Round Shed Use
In addition to insulation, consider implementing the following tips to maximize the usability and comfort of your shed:
- Adding Heating and Cooling Solutions: Set up a space heater, portable air conditioner, or a climate control system within the shed to ensure a consistently comfortable temperature throughout the year.
- Enhancing Lighting: Improve visibility inside the shed by installing adequate lighting fixtures, such as LED or overhead lamps.
- Incorporating Storage Solutions: Optimize storage space in the shed by adding shelves, cabinets, or storage bins to keep tools, equipment, and supplies organized.
- Maintaining Insulation Over Time: Regularly inspect and maintain the insulation in your shed to ensure it remains in good condition and continues to provide adequate thermal protection.
- Safety Considerations: When insulating your shed, follow safety precautions and guidelines, such as wearing protective gear and using proper tools and equipment.
Real-Life Examples and Case Studies
To provide readers with a more comprehensive insight into the advantages and obstacles of insulating a shed for year-round utilization, let's delve into real-life instances and case studies:
Case Study 1: The Home Office Shed
John, a freelance graphic designer, converted his backyard shed into a home office to escape distractions and create a dedicated workspace. However, he quickly realized that the shed was too cold in winter and hot in summer, making it uncomfortable to work in for extended periods. Determined to find a solution, John researched shed insulation techniques and decided to insulate his shed using foam board panels.
After insulating the shed's walls, ceiling, and Floor and ensuring proper ventilation, John noticed a significant improvement in comfort levels. His home office shed became a cozy retreat where he could focus on his work without being affected by external temperatures. With the added insulation, John's shed also became more energy-efficient, reducing heating and cooling costs throughout the year.
Case Study 2: The Hobbyist's Workshop
 An avid woodworker, Sarah transformed her old garden shed into a woodworking workshop where she could pursue her passion for crafting custom furniture pieces. However, she faced challenges with temperature fluctuations and humidity levels inside the shed, which affected the quality of her work and the condition of her tools and materials.
Sarah decided to insulate her shed using spray foam insulation, known for its superior air-sealing properties, to address these issues. She meticulously sealed all gaps and cracks in the shed walls and ceiling, ensuring maximum insulation effectiveness. Additionally, Sarah installed passive ventilation vents to maintain airflow and prevent moisture buildup.
The results were remarkable – Sarah's insulated workshop shed provided a stable and comfortable environment for woodworking year-round. She no longer had to worry about temperature fluctuations affecting her projects, and her tools and materials remained optimal. With improved insulation, Sarah's workshop shed became a haven where she could unleash her creativity without limitations.
Case Study 3: The Garden Storage Shed
Mark and Lisa, avid gardeners, used their backyard shed to store gardening tools, supplies, and seasonal decorations. However, they noticed that the shed became damp and musty during the rainy season, leading to mold growth on their belongings. Concerned about the impact on their stored items and the overall condition of the shed, they decided to explore insulation options.
After researching various insulation materials, Mark and Lisa opted for reflective foil insulation, known for its moisture-resistant properties. They installed the foil insulation on the shed walls and ceiling, creating a barrier against heat and moisture penetration. Additionally, they added a dehumidifier and a solar-powered exhaust fan to maintain optimal humidity levels and ventilation inside the shed.
The outcome exceeded their expectations – Mark and Lisa's insulated garden shed provided a dry and protected environment for their gardening equipment and supplies. They no longer had to worry about mold or moisture damage, allowing them to enjoy their gardening hobby year-round without concerns about storage conditions.
These practical instances showcase how insulating sheds can profoundly improve their functionality, comfort, and energy efficiency, catering to diverse needs and purposes. By addressing insulation needs based on climate, shed type, and intended use, individuals can maximize the usability and enjoyment of their sheds throughout the year. Whether it's for work, hobbies, or storage, insulating your shed is a worthwhile investment that offers long-term benefits and enhances the overall value of your property.
Comparison of Shed Insulation Materials
| Insulation Material | Pros | Cons |
| Fiberglass | - Affordable | - Can irritate skin and lungs |
| - Easy to install | - Prone to moisture absorption | |
| Foam Board | - High R-value | - More expensive than fiberglass |
| - Resistant to moisture and insects | - Not suitable for all shed types | |
| Spray Foam | - Excellent air-sealing properties | - Requires professional installation |
| - Provides superior insulation | - Expensive | |
| Reflective Foil Insulation | - Reflects heat away from the shed | - Less effective in cold climates |
| - Lightweight and easy to install | - Requires proper installation | |
| Natural Materials | - Environmentally friendly options | - Variable R-value |
| (e.g., Wool, Cotton) | - Renewable and biodegradable | - Prone to pests and mold growth |
This table briefly overviews various shed insulation materials, outlining their advantages and disadvantages. It aims to assist you in making well-informed choices regarding insulation for your shed.
Conclusion
Insulating your shed for year-round use is a practical and rewarding endeavor that can significantly enhance the space's comfort, functionality, and energy efficiency. By recognizing the significance of insulating your shed, choosing appropriate materials and methods, and adhering to correct installation and upkeep procedures, you can establish a comfortable sanctuary, an efficient workspace, or a dependable storage space tailored to your requirements, surpassing your anticipations.
With effective shed insulation, the possibilities are endless. You can transform a backyard shed into a home office or workshop or create a protected storage space for gardening equipment and supplies. By insulating your shed, you improve its usability and comfort and increase its value and appeal as an integral part of your property.
Remember to assess your shed's specific requirements, consider climate and shed construction factors, and choose insulation materials and methods that align with your goals and budget. Whether you opt for fiberglass batts, foam board panels, spray foam insulation, reflective foil insulation, or natural materials like wool or cotton, the key is to ensure proper installation and ventilation to maximize insulation effectiveness and long-term performance.
With the tips, techniques, and insights shared in this guide, you're well-equipped to embark on your shed insulation journey and unlock the full potential of your outdoor space. Whether you're seeking to create a comfortable retreat, a functional workspace, or a reliable storage solution, insulating your shed for year-round use is a worthwhile investment that will enhance your quality of life and enrich your everyday experiences.
Begin by taking the initial step to enhance comfort and flexibility – insulate your shed now and unlock a world of limitless opportunities!
- Shed Maintenance & Care: Keep Your Shed in Top Shape
- Shed Foundations Explained: 7 Options & How to Choose
- How to Build a Shed: Step-by-Step Foundation to Roof
- The Complete Guide to Buying a Shed: Comparison & Tips
- Crafting Affordable Dream Sheds: Cost-Effective Solutions for You
- Affordable Outdoor Storage: Budget-Friendly Shed Alternatives
- Cheap Shed Options: 9 Affordable Picks Under $500 (2026)
- Crafting Cost-Effective Solutions: Affordable Shed Construction Explained
- Empowering Your Space: Tips for Managing Shed Construction Budget
- Unveiling Shed Building Cost Estimator: Your Budgets Best Friend

Leave a Reply
You must be logged in to post a comment.